The Self-Service portal allows delegated users — Self-Service Users — to manage endpoints within their assigned Endpoint Identity Groups. This includes viewing device details, adding individual devices, and performing batch uploads of multiple endpoints.Documentation Index
Fetch the complete documentation index at: https://wiki.netgraph-connect.com/llms.txt
Use this file to discover all available pages before exploring further.
Group overview
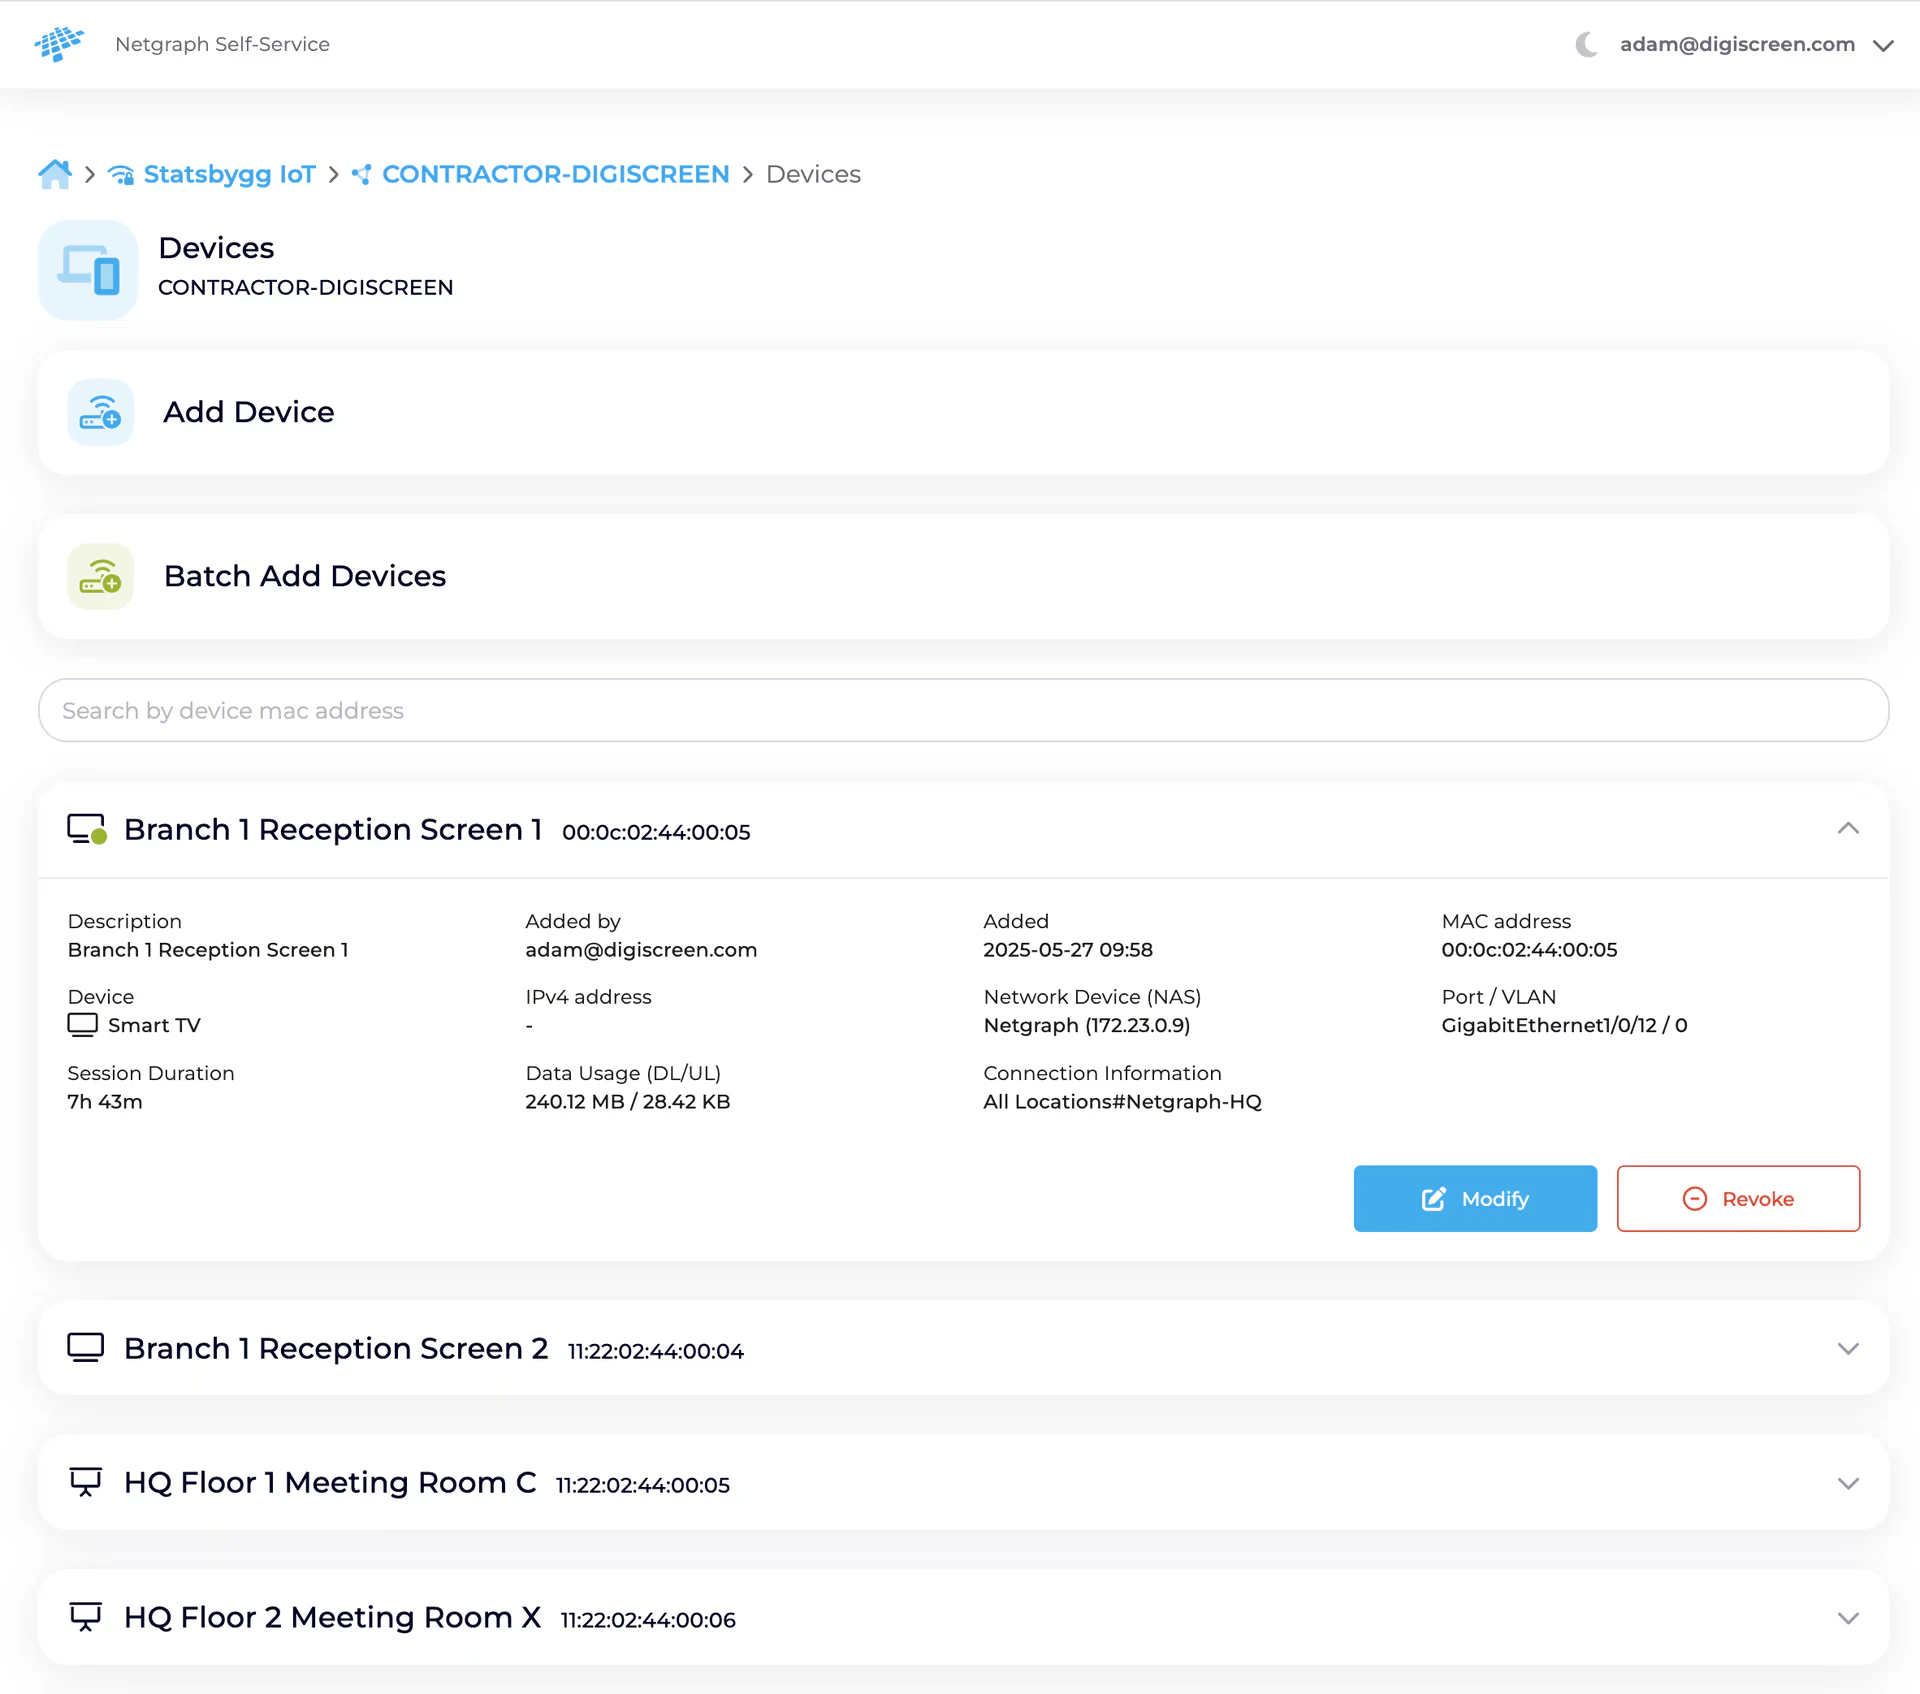
When opening an assigned Endpoint Identity Group, a Self-Service User can view a detailed list of all registered endpoints. Each listed device shows:- MAC address.
- Description (for example, room location or screen name).
- Device type (for example, Smart TV, Smartboard).
- Session duration.
- Data usage (download / upload).
- Connection information (NAS, port / VLAN, location).
- Added by and added date.
Add Device
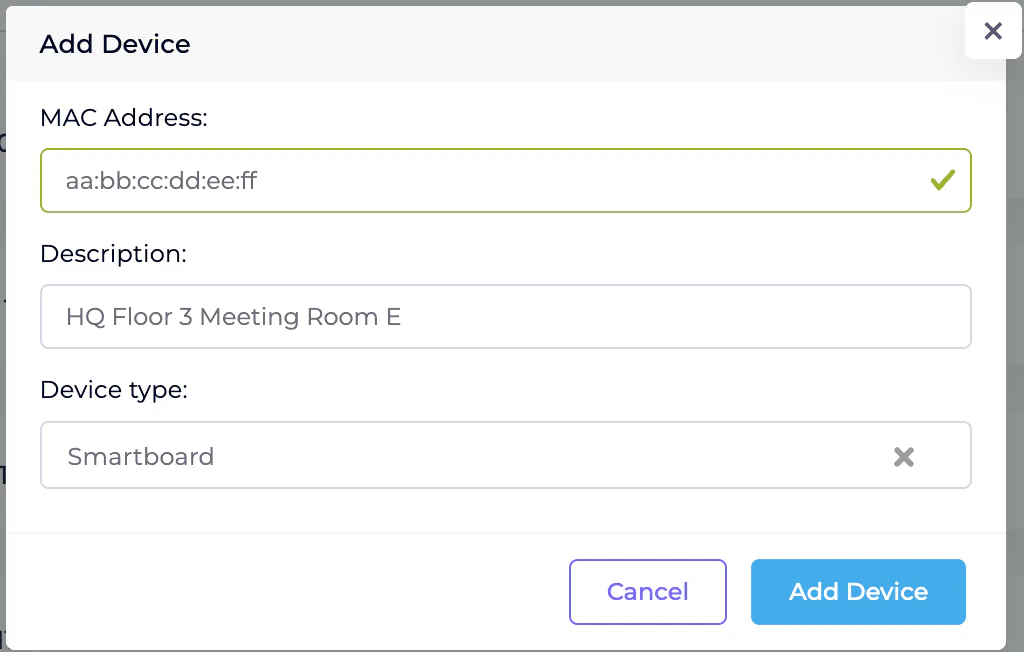
A Self-Service User can add a single endpoint by providing basic device details:- Click Add Device.
- Enter the required information:
- MAC address (required).
- Description (for example, the room name or location).
- Device type — select from the predefined list.
- Click Add Device to complete the registration.
Batch Add Devices
For bulk registration, Self-Service Users can upload a CSV file containing multiple devices.CSV format
The uploaded file must be comma-separated, with no header row and the following columns:- Column 1: MAC address.
- Column 2: Description.
- Column 3 (optional): Device type — must match the accepted values for the Context.
Supported device types
The accepted device types typically includemobile, tablet,
computer, desktop, sensor, camera, console, clock,
printer, watch, smart_tv, vacuum, chromecast,
speaker, smartboard, coffee, car, charging_station,
door_lock, phone, flux, scanner, wearable, other and
ethernet. The exact list available in a given Context is
displayed on the batch upload screen.
Upload process
- Click Batch Add Devices.
- On the upload screen:
- Prepare the CSV file according to the format above.
- Use the Browse button to select the file.
- Click Upload File.
- Review the preview of parsed endpoints.
- Confirm the upload to register all listed devices in the current Endpoint Identity Group.
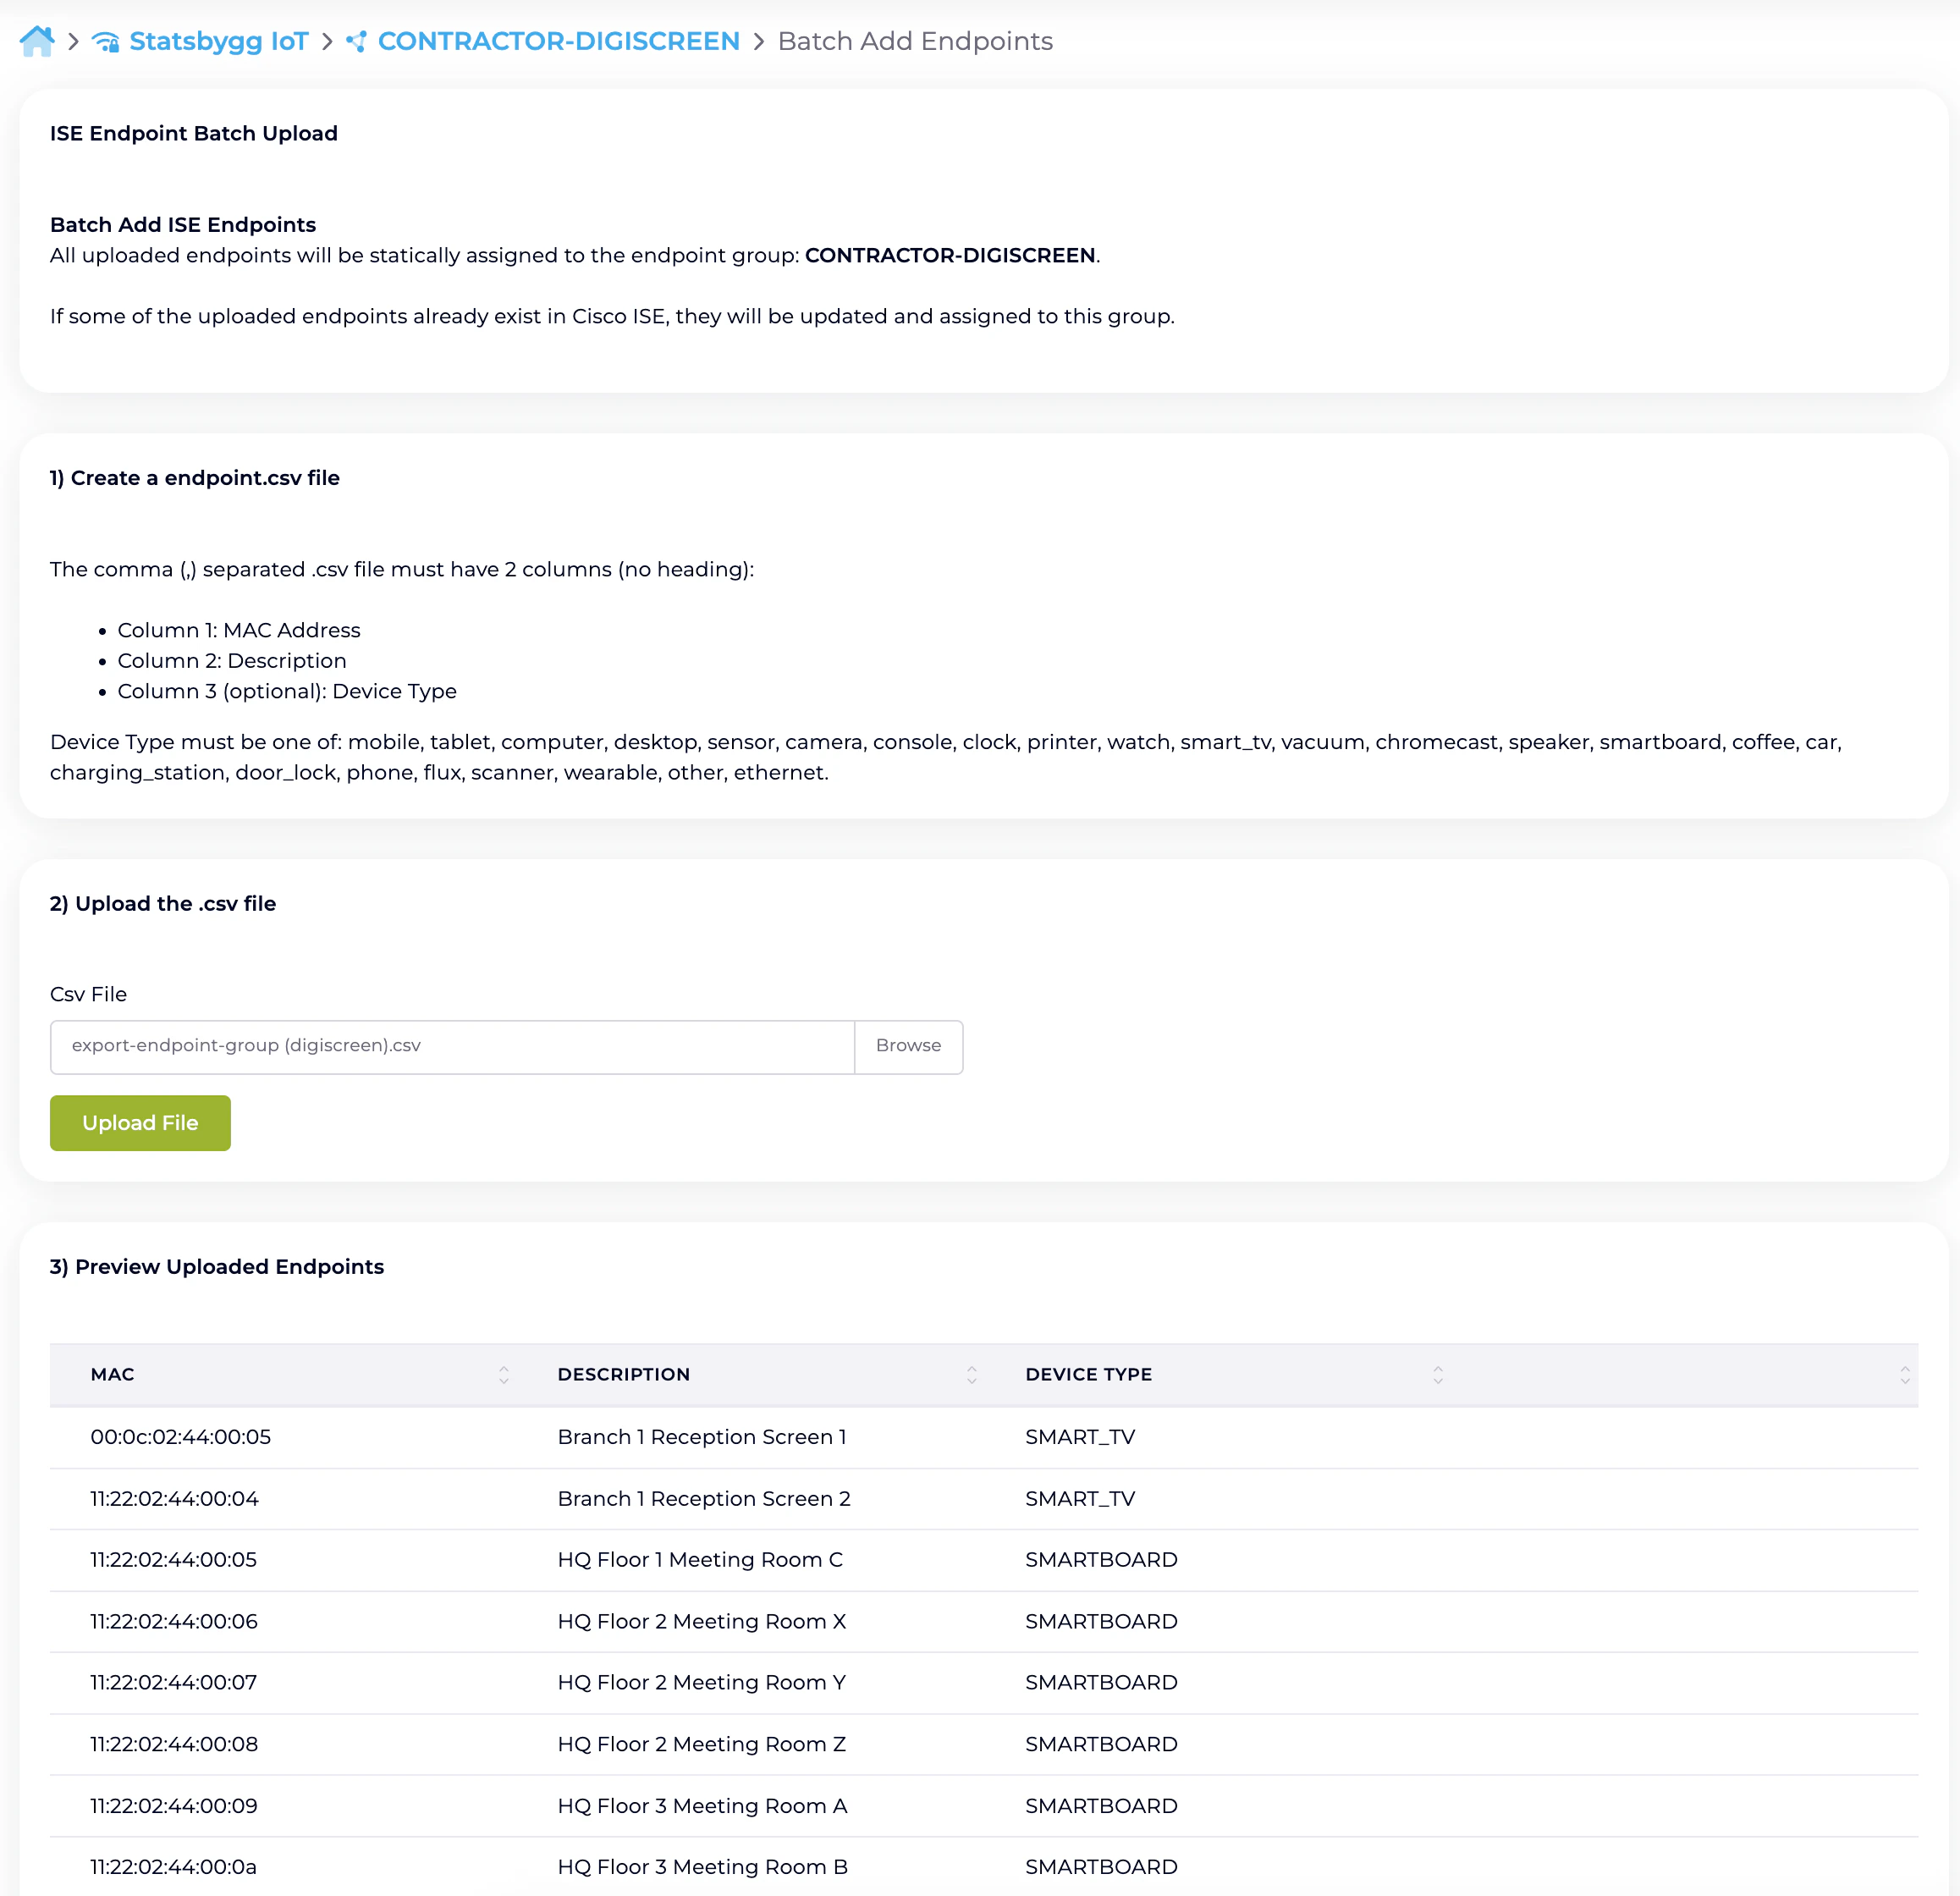
If any MAC address in the upload already exists in Cisco ISE,
the existing record is updated and the endpoint is reassigned
to the current group.
Notes
- Only Self-Service Users with the relevant permissions can perform these actions.
- Uploaded endpoints are statically assigned to the group — they remain members until explicitly revoked.
- All changes are written to Cisco ISE immediately through the platform’s API integration.
Related
Managing Self-Service Users
The admin-side invite, promote, revoke flow.
Delegated administration
Where the role boundaries sit.
Batch adding endpoints
The admin-side equivalent of the same four-step CSV wizard.
Organization SAML authentication
Single Sign-On for the Self-Service portal.